
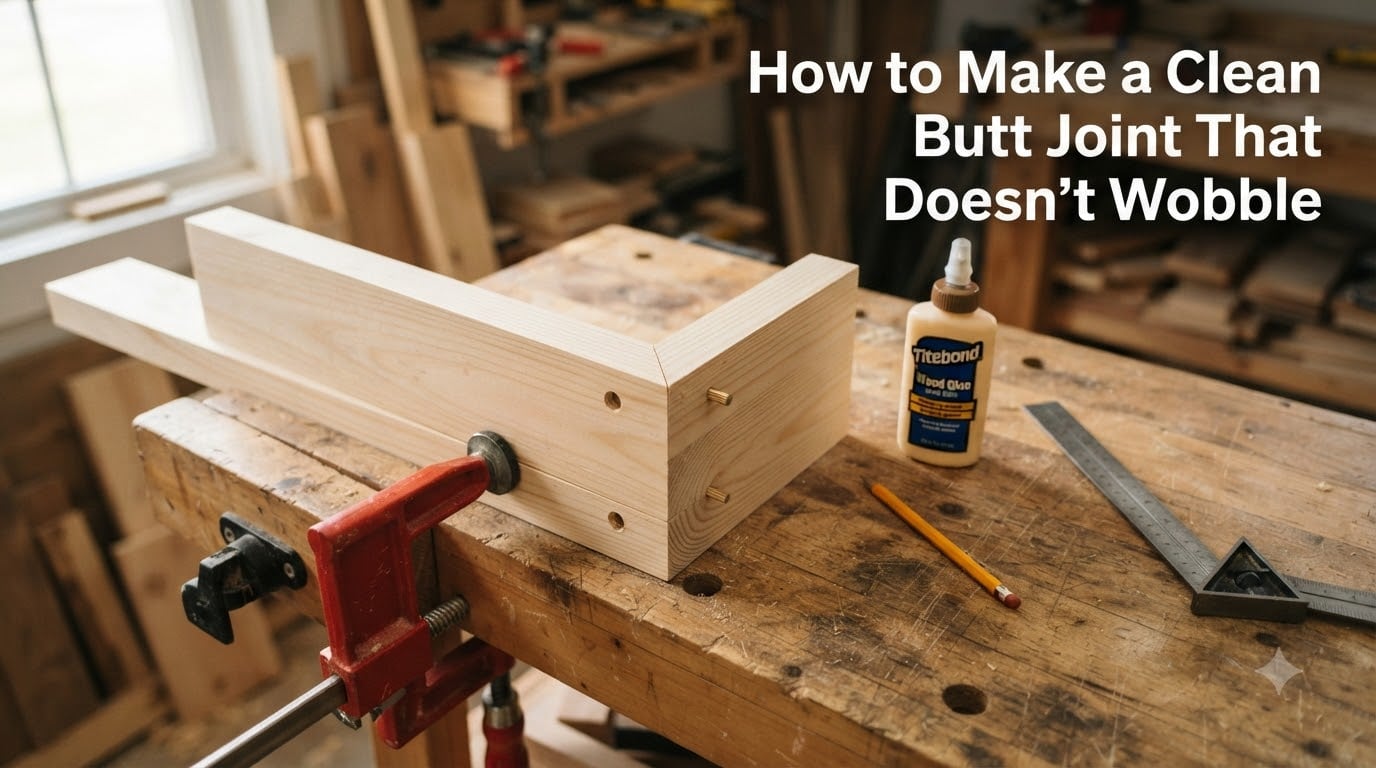
A butt joint is the simplest woodworking connection you can make, but it is also the one most likely to wobble, rack, or fall apart if you do not build it right. I have built hundreds of frames, cabinets, and shelves over the years, and I can tell you that almost every wobble problem traces back to a few fixable mistakes. The good news is that once you understand what causes the movement, a clean butt joint that stays rock-solid is entirely within reach.
In this guide, I will walk you through exactly how to make a clean butt joint that doesn’t wobble. We will cover why butt joints fail, how to cut perfectly square ends, which reinforcement method to choose, and the clamping tricks that keep everything aligned during glue-up. Whether you are building a picture frame, a cabinet carcass, or a simple shelf, these techniques will give you joints that hold tight.
Table of Contents
- What Is a Butt Joint in Woodworking?
- Why Butt Joints Wobble: The Root Causes
- Tools and Materials You Need for a Clean Butt Joint
- How to Make a Clean Butt Joint That Doesn’t Wobble: Step by Step
- Reinforcement Methods to Lock Your Butt Joint Solid
- Alignment and Clamping Tricks for a Wobble-Free Joint
- Common Butt Joint Mistakes That Cause Wobble
- FAQs
- Conclusion
What Is a Butt Joint in Woodworking?
A butt joint is a woodworking connection where the end grain or edge of one board meets the face or edge of another board at a right angle. No special cuts, no interlocking pieces, no fancy joinery. You simply bring the two pieces together and secure them. That simplicity is exactly what makes the butt joint so popular with beginners and experienced woodworkers alike.
The catch is that a plain butt joint is structurally weak on its own. End grain acts like a bundle of straws, and glue soaked into those straw-like fibers does not bond well. That is why every solid butt joint needs some form of reinforcement. Screws, dowels, biscuits, or splines all add mechanical strength that glue alone cannot provide.
There are several variations worth knowing. A square butt joint is the standard 90-degree end-to-face connection. A mitered butt joint joins two beveled ends at 45 degrees, hiding the end grain entirely. A T-butt joint connects one piece to the middle of another, forming a T shape. Each type shares the same fundamental weakness and the same solution: precise cutting plus mechanical reinforcement.
Why Butt Joints Wobble: The Root Causes
If your butt joint wobbles, one of four things went wrong. Understanding which one is affecting your project is the first step toward fixing it permanently.
Crooked or uneven cuts. If your saw blade was not perfectly square to the board face, or if the cut angle was off by even a degree or two, the joint will never sit flush. Even a tiny gap on one side translates into visible wobble once the pieces are joined. I always check my cuts with a combination square before assembling anything.
End grain glue failure. Wood glue works by soaking into long grain fibers and creating a bond between them. End grain absorbs glue like a sponge but does not create a strong bond because the glue gets pulled deep into the wood rather than staying at the surface. Glue alone on a butt joint will hold for a while, but any sideways pressure will eventually break it.
Insufficient clamping pressure. If the pieces shift during glue-up, or if you did not use enough clamps, the glue line will be uneven. A thick glue line is actually weaker than a thin one because glue itself is not structural. You need firm, even pressure across the entire joint surface.
No mechanical reinforcement. This is the biggest offender. A glue-only butt joint has almost no resistance to racking forces, which is the sideways pressure that causes wobble. Pocket screws, dowels, or biscuits lock the pieces together mechanically so that even if the glue bond weakens, the joint stays put.
Tools and Materials You Need for a Clean Butt Joint
You do not need a shop full of expensive tools to make a solid butt joint. Here is what I keep on hand for every butt joint project.
Cutting tools: A miter saw or table saw with a sharp, clean blade. A speed square or combination square to verify your cuts. A pencil for marking. If your saw is even slightly out of alignment, every joint downstream will suffer.
Reinforcement tools (pick one): A pocket hole jig (like a Kreg jig) for pocket screws. A doweling jig with appropriately sized dowel pins for dowel reinforcement. A biscuit joiner and biscuits for floating tenon reinforcement. Each tool produces a different type of reinforcement, and I will help you choose the right one in the next section.
Assembly tools: Bar clamps or pipe clamps sized for your project. A dead-blow mallet for tapping pieces into alignment. Wood glue (I use standard yellow PVA glue for most projects). A damp rag for wiping away squeeze-out. Painter’s tape can also help hold pieces in place while you position clamps.
How to Make a Clean Butt Joint That Doesn’t Wobble: Step by Step
This is the core process I follow for every butt joint. Work through these steps in order, and you will eliminate nearly every cause of wobble.
Step 1: Mark and Cut Both Pieces Square
Start by marking your cut lines with a pencil and a square. Do not trust the factory end of a board, since it is rarely perfectly square. Cut each piece slightly long first, then trim to your final mark. This two-cut approach gives you a cleaner, more accurate edge.
After cutting, check every end with a combination square. Place the square against the face of the board and slide it to the cut end. If you see light between the square and the cut, your saw needs adjustment. Fix the saw, not the board. A file or block plane can clean up minor imperfections, but a badly angled cut needs a recut.
Step 2: Dry-Fit Everything Before Glue
Bring the pieces together without any glue and check the fit. The end grain should sit flush against the face of the mating piece with no gaps. If the pieces rock or tilt, you have a cut problem to fix first. Dry-fitting also lets you plan your clamp placement and reinforcement positions before the clock starts ticking with wet glue.
Step 3: Drill Your Reinforcement Holes
Whether you are using pocket screws, dowels, or biscuits, now is the time to prepare the mechanical connection. For pocket screws, set your jig depth according to the thickness of your material and drill the holes on the inside face of the joint. For dowels, mark matching hole locations on both pieces using a doweling jig to keep everything aligned. For biscuits, cut slots in both pieces at matching locations.
Take your time here. Misaligned reinforcement holes will pull the joint out of square when you assemble it. I mark all locations with a pencil first and double-check alignment before drilling.
Step 4: Apply Glue Sparingly but Completely
Apply a thin, even layer of wood glue to the end grain of the joining piece. Then apply a thin layer to the face where the end grain will sit. Do not flood the joint with glue. A thin, complete film creates a stronger bond than a thick pool. Use a small brush or your finger to spread it evenly.
If you are working with particularly porous woods that drink up glue, apply a first coat, let it soak in for a minute, then apply a second thin coat. This technique, called sizing, prevents the wood from absorbing all the adhesive before it can bond.
Step 5: Assemble and Clamp Immediately
Bring the pieces together and engage your reinforcement, whether that is driving dowels home with a mallet, inserting biscuits into their slots, or aligning pocket holes for screws. Apply clamps right away before the glue starts to skin over.
Use at least two clamps for any joint to distribute pressure evenly. One clamp in the center can bow the pieces outward at the edges, leaving weak spots. Check for square with a framing square immediately after clamping while you still have time to adjust.
Step 6: Tighten Reinforcement and Check Alignment
Drive your pocket screws snug but not overtightened. Tap dowels flush if they are protruding. Use a straightedge across the joint to make sure both pieces are coplanar. If one side is higher than the other, adjust your clamps or use a caul, which is a small block of wood placed between the clamp and the workpiece to distribute pressure evenly.
Step 7: Clean Up Squeeze-Out and Let It Cure
Wipe away glue squeeze-out with a damp cloth while it is still wet. Dried glue is hard to remove and will interfere with finishing later. Leave the clamps on for the full cure time listed on your glue bottle, usually 24 hours for maximum strength. Resist the temptation to unclamp early, since the bond is still developing internally.
Reinforcement Methods to Lock Your Butt Joint Solid
Choosing the right reinforcement method is what separates a wobbly joint from one that lasts decades. I have used all four of these methods extensively, and each has its place.
Pocket Screws
Pocket screws are my go-to for quick projects and shop furniture. A pocket hole jig drills an angled hole through one piece and into the end of the mating piece. You drive a specialized screw with a washer head that pulls the pieces together tightly.
The speed is unbeatable. You can drill, drive, and be done in under two minutes per joint. The downside is visible holes on the inside of your project. For cabinet carcasses and frames where the inside is not visible, pocket screws are hard to beat. For visible work like display shelves, the holes may bother you.
Dowels
Dowel joints provide excellent alignment and serious strength. You drill matching holes in both pieces and insert hardwood dowel pins with glue. The dowels act as floating tenons that resist racking forces far better than screws alone.
Alignment is the trick. A good doweling jig makes the process straightforward, but freehand drilling will leave you with misaligned joints. Once you get the hang of it, dowels produce nearly invisible joints with strength that rivals traditional mortise and tenon construction.
Biscuits
Biscuit joinery uses a dedicated tool to cut matching football-shaped slots in both pieces. You insert a compressed wood biscuit with glue, and the biscuit swells as it absorbs moisture, locking the pieces together.
Biscuits excel at alignment during assembly, which makes them ideal for panel glue-ups and wide joints. For pure racking strength in a butt joint, they are weaker than dowels or pocket screws. I use them when alignment is the main concern and racking forces are low.
Glue Blocks and Corner Braces
Glue blocks are small triangular or square blocks glued and screwed into the inside corner of a butt joint. They add a surprising amount of rigidity for almost no cost or effort. I use them in drawer boxes, cabinet corners, and any hidden joint that needs extra stiffness.
Corner braces made of metal serve the same purpose and can be removed if you ever need to disassemble the piece. They are a great option for knockdown furniture or projects that need to survive shipping.
Alignment and Clamping Tricks for a Wobble-Free Joint
Even with perfect cuts and solid reinforcement, poor clamping technique can introduce wobble. Here are the tricks I have learned that make a real difference.
Use cauls to prevent bowing. A caul is a scrap piece of wood placed between your clamp and the workpiece. It spreads the clamping pressure across a wider area and prevents the clamp from denting or bowing the wood. For wide joints, a caul the full width of the piece ensures even pressure.
Clamp in both directions. For a corner joint, use one clamp running perpendicular to hold the pieces together and another clamp running diagonally to keep the corner square. Two clamps working at different angles lock the joint against movement in every direction.
Use painter’s tape as a clamp extender. For small pieces where clamps will not fit, wrap painter’s tape tightly around the joint. The tape holds everything together while the glue sets. It works especially well for picture frame corners and small boxes.
Check square at multiple points. Measure diagonally across the assembly from opposite corners. If both diagonal measurements are equal, your assembly is square. If they differ, adjust your clamps until the measurements match.
Do not overtighten clamps. Cranking a clamp down as hard as you can actually forces glue out of the joint, creating a starved glue line that is weak. Tighten until you see consistent squeeze-out along the entire joint, then stop.
Common Butt Joint Mistakes That Cause Wobble
I have made every one of these mistakes at some point, and they are all preventable once you know what to watch for.
Relying on glue alone. I see this constantly in beginner forums. A glue-only butt joint might hold for a few weeks, but the first time someone leans on the shelf or bumps the frame, the joint fails. End grain does not bond well enough to resist racking forces on its own. Always use mechanical reinforcement.
Skipping the dry-fit. Glue sets fast, and once it starts to tack up, you have maybe three minutes to get everything positioned. If you discover a fit problem during glue-up, you are in trouble. Dry-fitting catches issues while they are still easy to fix.
Using the wrong screw length. Pocket screws that are too short will not engage the mating piece. Screws that are too long will poke through the other side. Check the screw length chart that comes with your jig and use the correct size for your material thickness.
Clamping too late. If you position your clamps after the glue has started to set, the pieces will resist moving into the correct position. You end up fighting the glue, which either leaves gaps or forces the joint out of alignment. Have your clamps ready and apply them immediately after assembly.
Ignoring wood movement. Wood expands and contracts with humidity changes. If you lock a wide board rigidly across its grain direction, it will eventually crack or warp. For wide panels, consider allowing for movement with slotted screw holes or floating panel construction.
FAQs
What is the weakest joint in carpentry?
The unreinforced butt joint is the weakest joint in carpentry. Because end grain does not bond well with glue, a butt joint held together with adhesive alone has almost no resistance to racking forces. Adding dowels, pocket screws, or biscuits dramatically increases its strength.
How to make screwless joints?
You can make strong screwless joints using dowels, biscuits, splines, or butterfly keys with wood glue. Dowels are the strongest screwless option for butt joints, as they provide excellent alignment and resist racking forces well. Apply glue to both the dowel and the mating surfaces for maximum strength.
Which is stronger, dowels or pocket screws?
Dowels are generally stronger than pocket screws for butt joints in terms of racking resistance. A dowel joint with properly fitted hardwood dowels creates a bond that rivals a mortise and tenon. Pocket screws are faster and easier but slightly weaker because the screw threads can strip in softer woods.
Are pocket screws stronger than biscuits?
Yes, pocket screws are stronger than biscuits for resisting racking forces in butt joints. Biscuits are primarily an alignment aid and add modest shear strength. Pocket screws provide significant mechanical clamping force that holds the joint together firmly. For joints under load, choose pocket screws or dowels over biscuits.
Why does my butt joint wobble after glue dries?
Your butt joint probably wobbles because it lacks mechanical reinforcement, was cut at an angle, or was clamped unevenly during glue-up. End grain glue alone cannot resist sideways pressure. Add dowels, pocket screws, or biscuits, verify your cuts are square with a combination square, and use multiple clamps to ensure even pressure across the entire joint surface.
Conclusion
Making a clean butt joint that doesn’t wobble comes down to three things: square cuts, proper reinforcement, and careful clamping. Cut every piece true with a verified square, add mechanical fasteners like dowels or pocket screws to handle racking forces, and clamp with even pressure in multiple directions. Avoid the trap of glue-only joints, which will always fail under sideways pressure.
I have watched beginner woodworkers transform their projects simply by adding dowels or pocket screws to their butt joints. The difference between a wobbly frame and a rock-solid one is not talent or expensive tools. It is technique. Follow these steps on your next project, and you will see the difference immediately.